Everything is drugstore, as most people use those products, rather than high end. And let's face it my loves, I only have a handful of high end products; so I got you boo!
I hope you enjoy the video - and I hope you enjoy the images and links below to everything that I used.
And always remember, It's just a little Grace.
LOVE YOU!
How To | Just The Face - Drugstore
Step One: Primer
After you have moisturized your face, you are wanting to prime your skin and prepare your face for all the products that will be sitting on top of your skin. It's always great to go in with a primer that suits your needs.
For example, today I am using the NYX Cosmetics Angel Veil Primer. This is going to get move a smooth and flawless application/appearance to my skin once all products are on.
If you are someone who has bigger pores, I would recommend the NYX Cosmetics Pore Filler Primer.
If you have very dry skin, and would like to have more luminosity to your skin, I would recommend the, L'Oreal Magic Lumi Light Infusing Primer.
Step Two: Foundation
Next taking the L'Oreal True Match Foundation in N2 Classic Ivory, just dot it all over your face and then blend it out with a beauty sponge or a brush of your liking. I have use this stuff since High School and have always kept it in my collection. This foundation is easily build able and would work great for any skin type, in my opinion.
For those who have super dry skin, try the L'Oreal Magic Lumi Foundation. It works wonders!
For those who have oilier skin, I would recommend two options; Maybelline Fit Me! Matte and Poreless Foundation ~or~ L'Oreal Infallible Pro-Matte Foundation
Step Three: Conceal & Brighten
First, taking the Maybelline Instant Age Rewind Eraser Dark Circles Treatment Concealer is LIGHT, I am going to conceal those lovely things we call dark circles. Yes, I'm even human and I get them even more now, than I did back in the day! That's the lovely thing we called life! This has more of a yellow/peach undertone, which will help hide those little ugly dark demons. I'm also going to take this down my nose, a little on my chin, and a little on my forehead - really targeting my inner portions of my face. Then, whether you have used a sponge or brush with your foundation, take that same tool and blend your first concealer in with it.
Second, taking the Maybelline Instant Age Rewind Eraser Dark Circles Treatment Concealer (wow that's a breath taker, even for my fingers!) in BRIGHTENING. Put this in the exact same areas you put the first concealer. This has a pink undertone to it, as this is going to help brighten and bring life to our inner part of the face. You'll again take that same tool and blend it all in.
You'll notice it will bring brightness to your inner portions of your face. That's what we want - we want to draw attention to the inner parts of our face. What's there? Your eyes, your lips; all things men and women look at when talking to one another.
Step Four: Set Concealer
Next, we are wanting to set any and all concealer. I am taking the Maybelline Fit Me! Matte & Poreless Powder in 100 Translucent
You really want a translucent powder for setting any liquids on your face. If you "set" your face with a foundation powder, well it can end up being too much product and end up being cake face. Especially in those areas we are wanting to "highlight" and "brighten" use a translucent powder, if you don't have a translucent, get a little shade of face powder and just sweep the product over the concealer. Again, be careful because we don't want too much product in those areas!
Step Five: Bronze baby, bronze
I am taking my Physicians Formula Butter Bronzer and adding that to the outer portions of my face. I'm not contouring today (future video/blog) so I'm really just wanting to give my skin a sun kissed look with adding a little bronzer. You want to add this to your high points of your forehead, your temples, cheekbones, and jaw line. I normally will bronze either side of my nose ever so lightly and a little under my bottom lip.
Step Six: Blush
I'm taking one of my all time favorite blushes from the drug store, Maybelline Master Hi-Light Blush. They have discontinues this one, but they have a bunch more which are super adorable (that will soon be in my collection).
Step Seven: Highlight
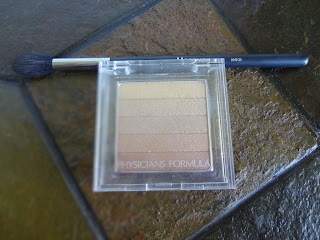
I am using the Physicians Formula Vegas Shimmer Strips - this is such a wonderful subtle highlight! I use the top 2 lighter colors. The bottom colors are too dark for me, but I think would look amazing on darker skin tones, and even as an eyeshadow look (maybe I really want to make a video on that)!
Step Eight: Set
Set, Set, Set! You always want to set everything in place! I have been LOVING this NYX Cosmetics Matte Finish Setting Spray. You definitely want to try this out!


